There are numerous options available for tracking and attributing phone calls. Many are sophisticated, provide a multitude of options and are well worth a look, but this post is about a quick and dirty way to measure ‘click to calls’ via the Facebook Ad Manager.
If you’re working on a campaign that’s driving great conversions, you could still be under reporting on success by missing out on call data. OK, even if you don’t have the ability to know what eventual revenue is driven by phone calls, getting a sense of how your campaigns lead to calls is still a useful metric to measure.
What you’ll need for this method:
- A website with click to call functionality on the contact number (duh)
- A Facebook account with the pixel correctly installed
- GTM implemented and used for your pixel implementation
- Pixel helper chrome plugin
So – really nothing complicated at all.
Assuming you’ve got steps one and two above sorted, let’s jump into the ‘how’.
Step 1 – create your custom event
The basis for your custom conversion in Facebook is going to be a custom event that essentially, we’ll just adapt the standard lead event slightly and rename as needed.
In this example, we’re going to start by taking the short script for the Facebook ‘lead’ event as you can see below:
<script>
fbq(‘track’, ‘Lead’);
</script>
All we’re going to do is change the script slightly by renaming from ‘Lead’ to ‘Click to Call’, and changing ‘track’ to ‘trackCustom’:
<script>
fbq(‘trackCustom’,’Click to Call’)
</script>
Step 2 – Fire your new event via Google Tag Manager
Once you’ve created the event above you’ll need to make sure it fires on the correct action – when someone clicks on your phone number.
Thankfully this is really easy using Google Tag Manager, and assuming you already manage your pixel implementation in GTM, there are only two steps you will need to take in order to make this work.
Firstly, you’ll need to create a brand new tag for your custom event. In this case we’ll name it ‘Facebook Pixel – Phone Call Click Event’ to make sure it’s nice and clear. Selecting a ‘Custom HTML’ tag, you simply add your event script in as follows:

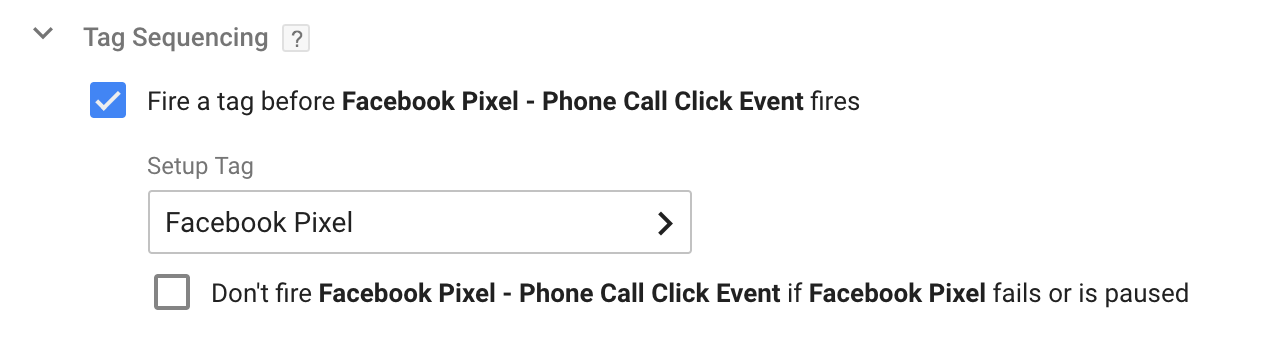
The second point here is that you will need to make sure your base pixel code fires before your custom event.
To do this, click on ‘tag sequencing’, then tick the ‘Fire a tag before Facebook Pixel – Phone Call Click Event fires’ option. In the ‘Setup Tag’ dropdown, simply select your base pixel tag:
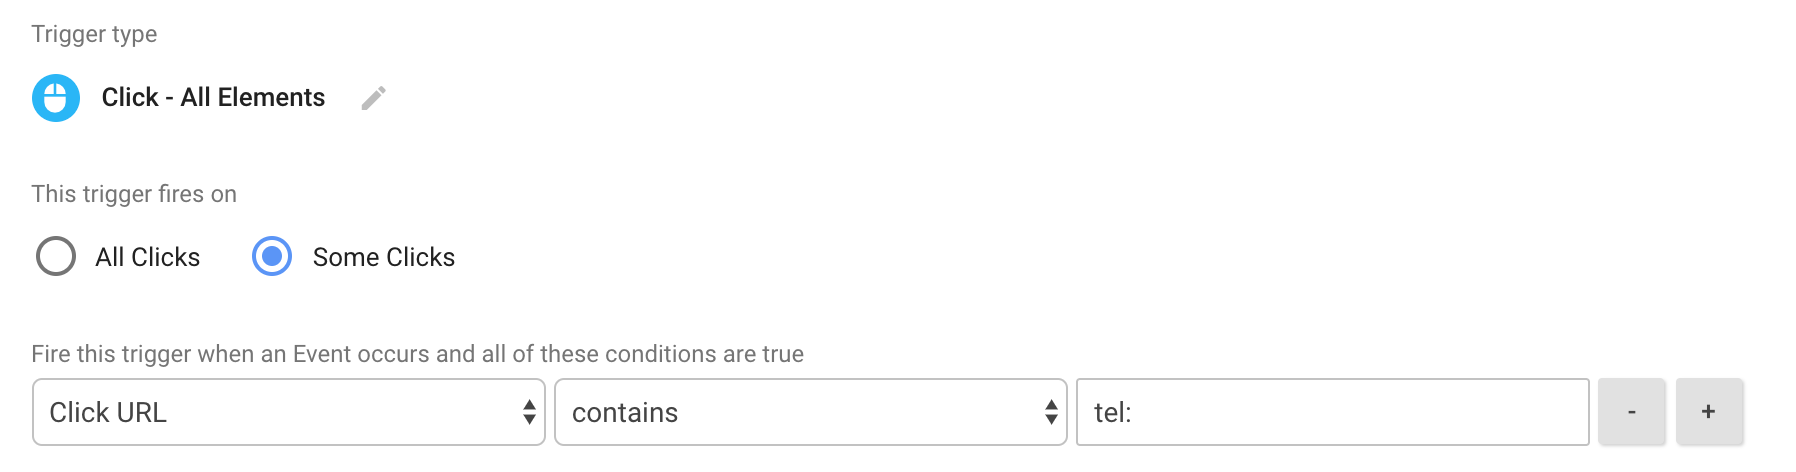
The final step is to setup a trigger to make sure your new custom event is fired when the correct action is taken.
Because we want our event to fire whenever someone clicks on our phone number, we are going to use ‘tel:’ as the identifier. When setting up the trigger, use a ‘click – all element’ trigger type, and set your rules as follows:
You can then save your tag and test using GTM’s preview mode. Once you’re satisfied your new event is firing only when someone clicks on your phone number, hit publish to set your new tracking live.
Step 3 – test Facebook is receiving your custom event
Now you have your custom event firing correctly it is time to do a few more tests to make sure Facebook is receiving the data correctly.
The first port of call for me is always the Facebook pixel helper chrome extension. Navigate to the website in question, click on the phone number, and you should see your new event appear:
![]()
This is the first check. The second way to test your new event is firing correctly is to view the event data in your Ad Manager. Once in your ad manager, head to the ‘pixels’ option on the menu, click on ‘Details’ and then scroll down to see your event activity:

If everything is correct, you should see activity being reporting here.
Step 4 – create your Custom Conversion
The next and final step is to create your custom conversion. This allows you to report back on the number of ‘click to call’ actions generated as a result of your campaigns, but also means you can then optimise the delivery of your ad sets towards this action.
To create a custom conversion, go to the ‘Custom Conversion’ option in the ‘Measure & Report’ section of the main navigation and click to create your new goal.
On the dropdown menu, select your new ‘Click to Call’ event as the criteria for your conversion and select ‘Lead’ as the category:
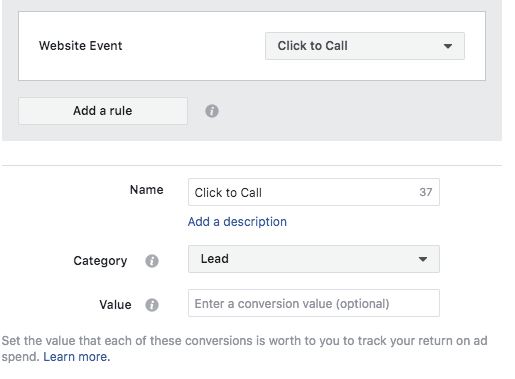
And there you have it – a custom conversion quickly set up to track click to calls from your campaigns.