It wasn’t long ago that the sole benefit of implementing the LinkedIn insights was conversion reporting directly in the campaign manager. That’s no bad thing, however with all the new features released last year (read here) advertisers now get a lot more benefit than just conversion tracking from implementing the pixel.
If you haven’t had a chance yet to catch up on the new options available for advertisers, here’s a quick recap on what you can now do via LinkedIn once you have the pixel installed on your website:
- You can retarget website traffic via LinkedIn
- You can get insights on your audience demographics and interests via the ‘website demographics’ report
- You can still track conversions!
Enabling all of the above goes someway to helping LinkedIn catch up with competing platforms.
So – if you’re looking to get started with LinkedIn and / or simply collect data via the website demographics reports, you’ll need to get the pixel implemented on your website. As the title suggests, we’re going to assume that you have Google Tag Manager (GTM) installed and ready to use.
How Do I Implement the LinkedIn Insights Pixel?
Thankfully, with GTM it’s incredibly easy. We’ll go through the steps in detail below, however if you just want the short version:
- Navigate to ‘account assets’ and then ‘insights pixel’ in your LinkedIn campaign manager
- Copy the pixel code and paste into a text editor. Then copy the ‘ID’ number only.
- In Google Tag Manager, create a new tag and scroll through the ‘tag type’ options until you see ‘LinkedIn Insights’.
- Drop your pixel ID into the box
- Set to trigger on all pages
Actions on the LinkedIn Side
As mentioned in the list above, everything you will need is housed in the ‘account assets’ option on your campaign manager navigation. Incidentally, this is the area of the account that houses your lead forms, so if you’re running lead forms and you need to download your data, this is where you can find it.
Once you get to the insights pixel, LinkedIn will run you through a simple set up giving you the pixel code and then helping you to set up your first conversion.
![]()
If you’re dropping the full pixel code into your websites header, you’ll need to copy everything you see above over. If you’re using GTM however, the only information you will need is the pixel ID. Annoyingly, you can’t just highlight the ID to copy it from within the pixel, so you will need to paste the full code into a text editor and then pull out the ID.
In terms of setting up conversions, again this is really simple. With the pixel implemented on all your website pages, the conversions work by tracking views of URLs that you specify. If you’ve set up a destination goal in GA before you’ll be familiar with this.
The main frustration here is that you can’t configure a conversion based on an event such as a ‘submit’ button click on a form. Given that a lot of B2B conversions are based on form fills, this is hopefully an area where LinkedIn will catch up.
Creating Your Tag in Google Tag Manager
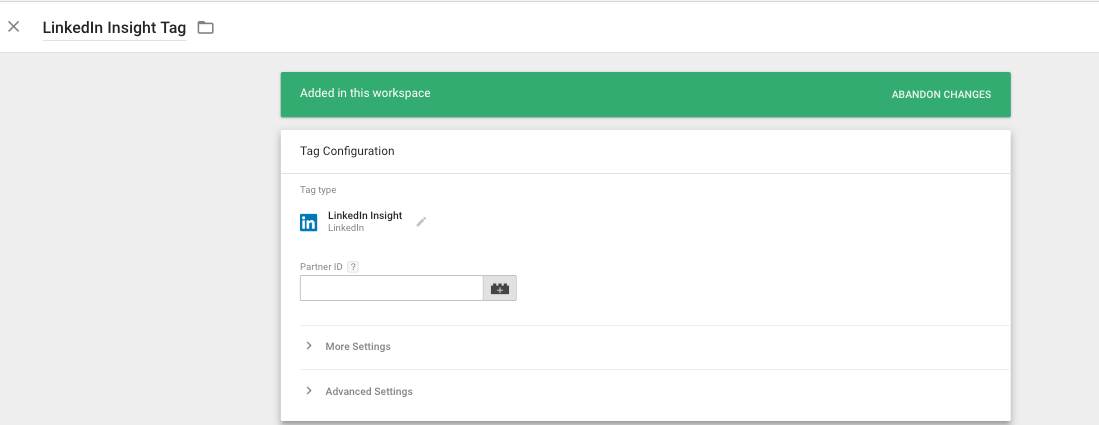
Once you have your pixel ID, you will then need to set up a tag in GTM. Thankfully, within GTM’s pre-configured tags there is an option for the LinkedIn insights pixel. As a result, all you need to add is your pixel ID, rather than copying all the code in:

You could of course copy the full pixel script and use a custom html tag if you wish, but with the option above there should be no reason to do so.
Once you have the ID entered into your tag, you will then need to set the pixel to fire on all pages. Unlike other tracking, essentially what you do with LinkedIn is to fire the pixel on all pages, and then set conversions via the campaign manager later.

The best way to check if you’ve done this correctly is to use GTM’s preview mode. By entering preview mode, you can navigate to a page on your website and see exactly which tags are fired and when. If your LinkedIn pixel tag is showing for all pages, you know you’re OK!

Hope this helps, and happy tracking!


